Sure, we’ve all tucked a receipt or scrap of paper into a book and called it a bookmark. But there’s something nicer about having a real bookmark—one that’s made by hand and feels like it belongs to you. Cyanotype bookmarks are easy to make, totally unique, and a lovely way to add a personal touch to your reading (or gifting).
Cyanotypes aren’t just beautiful—they’re surprisingly simple to make. With a few basic supplies and a little creativity, you can create stunning bookmarks that are sure to impress your book club mates.
Materials you’ll need
Before we dive in, let’s gather our supplies. Here’s what you’ll need:
- Cyanotype chemistry kit (A + B solution kits can easily found online or at your local art store)
- Watercolour paper or high quality cardstock (something thick enough to hold up to a bit of water, look for 300GSM or 300g/m2 on the package)
- Paintbrushes (brush or sponge tip, to apply the solution)
- Flat objects or botanical elements (leaves, flowers, lace, feathers, nails—anything you want to turn into art!)
- Sunlight or a UV lamp (Mother Nature’s giant UV lamp works best)
- Scissors or a craft knife (for cutting your paper into bookmark-sized strips)
- Water (for rinsing your prints)
- Old photo frame with clips (to keep your objects in place while exposing)
You can also skip the chemistry, paper and paintbrushes and use my pre-coated cyanotype bookmark kit instead—everything’s ready to go. Grab one in my Etsy shop.
Step-by-step: making cyanotype bookmarks
Ready to give it a try? Here’s how to make cyanotype bookmarks that are as fun to create as they are lovely to use:
Step 1. Prepare your paper
Cut your watercolour paper or cardstock into bookmark-sized strips. Standard bookmarks are about 2 inches wide by 6 inches long, but feel free to customize to your liking! I like mine at about 8 inches. If you want to go crazy and make a bookmark that’s the length of your table, you do you.
Step 2. Mix your cyanotype solution
Your cyanotype kit will come with two chemical solutions: Part A and Part B. Mix a small amount (like a teaspoon) equal parts of both in a place with no sunlight. No need to work in the dark; it’s usually fine to keep your regular incandescent room lights on (cyanotype chemicals are sensitive to UV light specifically). Stir well.
Step 3. Coat the paper
Using a paintbrush, apply a thin, even coat of the cyanotype solution to your paper strips. Think of it as painting with an invisible ink pen…it kind of gives you that retro science vibe. Let them dry in a dark place for about 30 minutes to an hour. You want them to be pretty dry before moving on to the next step. Alternatively, you can buy pre-treated paper and skip steps 1-3 entirely!
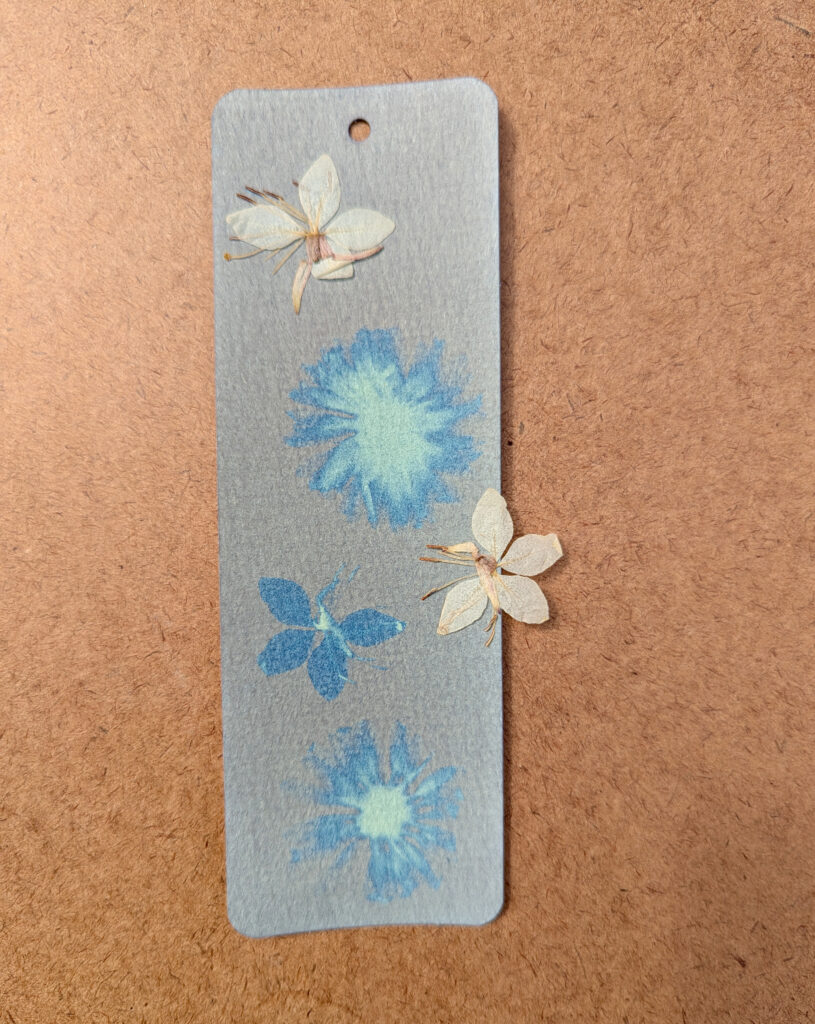
Step 4. Arrange your objects
Remove the bottom of an old frame and place your coated paper on it. Arrange your flat objects or botanical elements on top of the coated paper. You can go for a minimalist look with a single flower, or cover the entire strip with a variety of shapes for a more intricate design. Once you’re happy with your layout, place the frame glass or clear plastic on top to hold everything in place.
Step 5. Expose to sunlight
Take your soon-to-be bookmarks outside and place them in direct sunlight. This is where the magic happens! Watch as your paper transforms from a dull yellow-green to a brown blue under the power of UV light. Exposure time can vary depending on time of day, time of year and your location in the world. In my backyard in downtown Toronto, midday in on a high UV summer reading, it takes about 6 or 7 minutes. This can easily be 10 to 20 minutes in the shade or other times of the year, so keep an eye on it—when the paper around your objects turns a deep, bronzy color, it’s time to bring them back inside.
If it’s a rainy day, no worries! A UV lamp can work just as well (and it won’t require you to cross your fingers for sunshine).
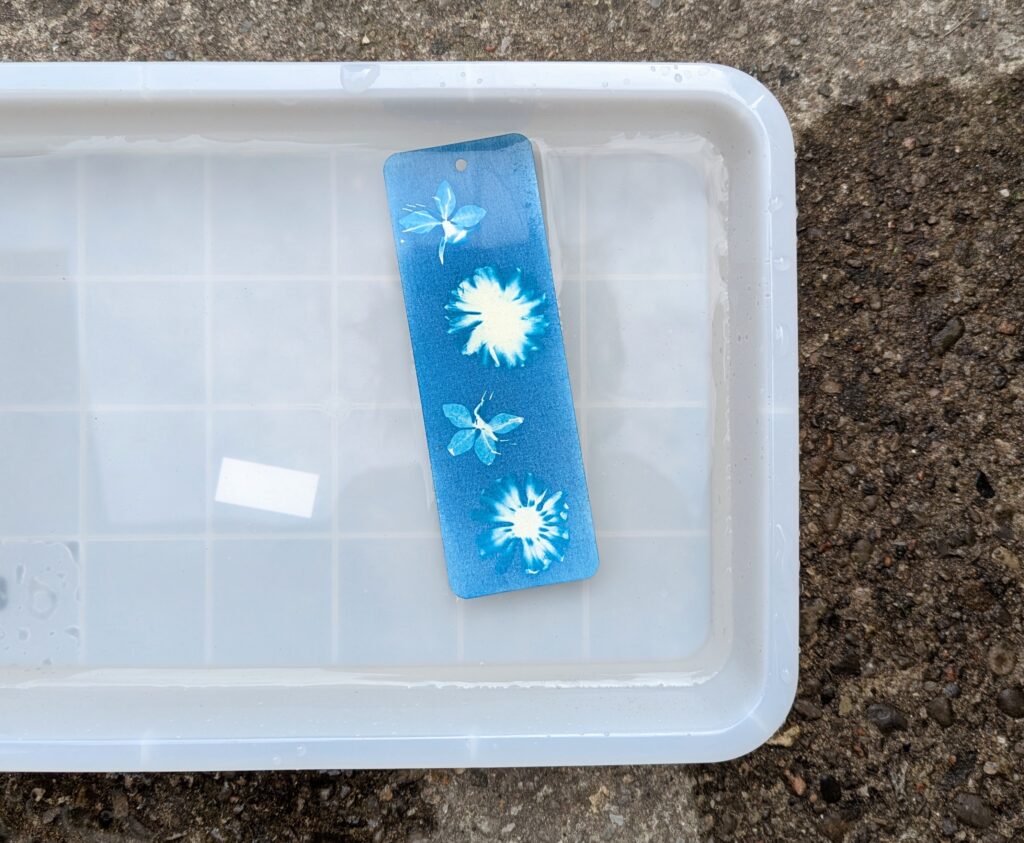
Step 6. Rinse and reveal!
Now comes the fun part. Carefully remove the objects from your paper strips and watch in awe as the unexposed areas revealed are a brilliant yellow. Then rinse them under cold water and watch in more awe as the unexposed areas turn a brilliant white, while the exposed areas become a deep, elegant blue. It’s like a magic trick, but better because you did it yourself!
Step 7. Dry and finish
Once your bookmarks are rinsed and the designs have appeared, lay or hang them flat to dry. They’ll probably need to be flattened, so press them between some books or something heavy before or after they dry. When dry, you can punch a hole at the top and add some decorative twine to give them an extra oomph. Or don’t. I like them as is.